Imagine vibrant bursts of red cascading from a hanging basket, a miniature tomato vineyard right outside your door. Growing cherry tomatoes in a hanging basket isn't just a charming aesthetic choice; it's a surprisingly practical way to enjoy fresh, homegrown goodness, even if you're short on space. It's easier than you might think, and the rewards are delicious! Growing Cherry Tomatoes in Hanging Baskets: A Complete Guide Growing cherry tomatoes in hanging baskets offers a delightful way to bring fresh produce to even the smallest spaces. Whether you have a sprawling garden or a tiny balcony, the vibrant foliage and sweet, juicy fruits of cherry tomatoes add beauty and flavor to your surroundings. This guide will walk you through every step, from choosing the right basket to harvesting your bountiful crop. Consider these tips your keys to unlocking a cascade of delicious cherry tomatoes right at your fingertips! Why Choose Hanging Baskets fo...
There's nothing quite like biting into a juicy, sun-ripened tomato straight from your own garden. That flavor, that vibrant color – it’s the reward for all the effort you put in. But getting those homegrown beauties starts with the right planting and care. Let's explore the ins and outs of getting your tomato starts safely and successfully into the great outdoors.
Timing is Everything: When to Plant Tomato Starts Outdoors
Successfullyplanting tomato starts outdoors hinges on timing. Jumping the gun can lead to stunted growth or even death of your precious plants. You need to wait until all danger of frost has passed in your area. Tomato plants are incredibly sensitive to cold temperatures, and even a light frost can severely damage or kill them.
Here's a checklist to ensure you're planting at the right time:
- Check your local weather forecast: Keep an eye on the long-range forecast to ensure no late frosts are predicted.
- Monitor soil temperature: Tomato plants thrive when the soil temperature is consistently above 60°F (15°C). You can use a soil thermometer to check this.
- Know your region's last frost date: This is a good guideline, but remember that microclimates in your yard can vary. Your local agricultural extension office is a great resource for this information.
Hardening Off Tomato Seedlings Before Planting
Before you plunge your tomato starts into the garden, they need to be "hardened off." This is the process of gradually acclimating them to the outdoor environment. Tomato starts raised indoors are used to consistent temperatures, sheltered conditions, and artificial light. A sudden transition to direct sunlight, wind, and temperature fluctuations can shock them. Hardening off prepares them for these challenges.
Here's how to harden off your tomato seedlings:
- Start slowly: Begin by placing your tomato starts outdoors in a sheltered location (like a porch or patio) for just an hour or two on the first day. Choose a day that is relatively mild and cloudy.
- Gradually increase exposure: Each day, increase the amount of time they spend outside by an hour or two.
- Sunlight exposure: Gradually increase their exposure to direct sunlight. Start with morning sun, which is less intense, and eventually move them to a location that receives full sun.
- Monitor your plants: Watch for signs of stress, such as wilting or leaf burn. If you see these, reduce the amount of time they spend outside.
- Wind protection: Provide protection from strong winds, especially during the initial hardening-off period.
- Watering: Ensure your plants are adequately watered during the hardening-off process, as they will dry out more quickly outdoors.
- Duration: The hardening-off process should take about a week to 10 days.
Preparing the Planting Site for Tomato Starts
Choosing the right location and preparing the soil are crucial for successfulplanting tomato starts outdoors. Tomatoes need at least 6-8 hours of direct sunlight per day. Choose a location in your garden that receives ample sunlight.
Soil Preparation:
- Soil Testing: Ideally, conduct a soil test to determine the p H and nutrient levels. Tomatoes prefer slightly acidic soil with a p H between 6.0 and
6.8.
- Amending the soil: Amend the soil with compost or well-rotted manure. This will improve drainage, aeration, and nutrient content. Work the amendments into the top 12 inches of soil.
- Drainage: Ensure the soil drains well. Tomatoes don't like sitting in soggy soil. If your soil is heavy clay, consider amending it with sand or raised beds.
- Fertilizer: Incorporate a balanced, slow-release fertilizer into the soil at planting time. Follow the instructions on the fertilizer package.
A well-prepared planting site gives your tomato starts the best possible start in their new home.
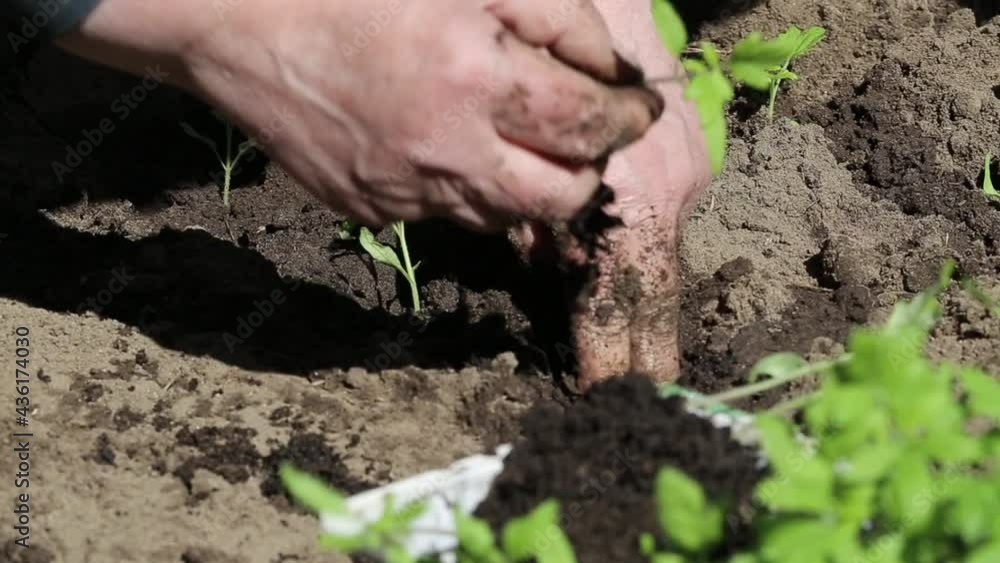
Planting Tomato Starts: The Step-by-Step Guide
Now that you've hardened off your tomato starts and prepared the planting site, it's time to get them in the ground. Here's a step-by-step guide:
- Dig the Hole: Dig a hole that is deep enough to bury the bottom portion of the tomato stem. Tomatoes have the unique ability to grow roots along their stems when buried, resulting in a stronger root system.
- Remove Lower Leaves: Pinch off the lower leaves of the tomato plant, leaving only the top few sets of leaves. This will prevent them from rotting when buried.
- Plant Deep: Place the tomato start in the hole, burying the stem up to the first set of leaves.
- Backfill and Water: Gently backfill the hole with soil, firming it around the base of the plant. Water thoroughly to settle the soil and provide the plant with moisture.
- Spacing: Space your tomato plants at least 24-36 inches apart, depending on the variety. Indeterminate varieties, which grow tall and need staking or caging, require more space than determinate varieties, which are bushier.
- Mulch: Apply a layer of mulch around the base of the plants. Mulch helps to retain moisture, suppress weeds, and regulate soil temperature. Organic mulches, such as straw or shredded leaves, are excellent choices.
Caring for Your Newly Planted Tomato Starts
Afterplanting tomato starts outdoors, consistent care is essential for their growth and productivity. Here's what you need to do:
Watering
Water your tomato plants deeply and regularly, especially during dry periods. Aim to water at the base of the plant to avoid wetting the foliage, which can increase the risk of disease. Water deeply and less frequently is better than shallow, frequent watering.
Tip: Check the soil moisture by sticking your finger into the soil. If the top inch or two feels dry, it's time to water. Consider investing in a soaker hose or drip irrigation system to efficiently deliver water to the roots.
Fertilizing
Tomatoes are heavy feeders and require regular fertilization. Use a balanced tomato fertilizer, following the instructions on the package. You can also side-dress your plants with compost or well-rotted manure every few weeks.
Staking, Caging, or Trellising
Many tomato varieties, especially indeterminate ones, require staking, caging, or trellising to support their growth. This prevents the plants from sprawling on the ground, which can lead to disease and pest problems. Install supports soon after planting to avoid damaging the roots later. Tomato cages are a great option for providing support. You can easily find high-quality ones online or at your local garden center.
Pest and Disease Control
Keep an eye out for common tomato pests, such as aphids, tomato hornworms, and whiteflies. Handpick pests when possible or use insecticidal soap or neem oil to control infestations. To help keep your garden properly watered, consider a brand new75 FT Garden Hose with a 10-Function Nozzle, offering leak-proof metal connectors. This amazing metal water hose, which will easily and effectively help you deliver much needed water to your garden, is kink-free, wear-resistant, and easy to use. See more at:https://amzn.to/3Yv E0Bo
Preventative measures, such as crop rotation, proper spacing, and good sanitation, can help to reduce the risk of disease. If diseases occur, treat them promptly with appropriate fungicides.
Troubleshooting Common Problems After Planting Tomato Starts
Even with careful planning and preparation, you may encounter some challenges afterplanting tomato starts outdoors. Here are some common problems and how to address them:
- Wilting: Wilting can be caused by underwatering, overwatering, or disease. Check the soil moisture and adjust your watering schedule accordingly. If the soil is consistently wet, improve drainage. If disease is suspected, consult with your local agricultural extension office for diagnosis and treatment options.
- Blossom End Rot: This is a condition where the bottom of the tomato develops a dark, leathery spot. It is caused by a calcium deficiency in the fruit, often due to inconsistent watering. Ensure consistent watering and amend the soil with calcium if necessary.
- Sunscald: This occurs when tomatoes are exposed to excessive sunlight, causing them to develop a white or yellow patch on the side facing the sun. Provide shade during the hottest part of the day.
- Pests: Monitor your plants regularly for pests and take action promptly to prevent infestations from becoming severe.
By addressing these common problems promptly, you can ensure that your tomato plants remain healthy and productive.
Planting tomato starts outdoors can be a rewarding experience. By following these tips and providing your plants with the care they need, you can enjoy a bountiful harvest of delicious, homegrown tomatoes.