Imagine vibrant bursts of red cascading from a hanging basket, a miniature tomato vineyard right outside your door. Growing cherry tomatoes in a hanging basket isn't just a charming aesthetic choice; it's a surprisingly practical way to enjoy fresh, homegrown goodness, even if you're short on space. It's easier than you might think, and the rewards are delicious! Growing Cherry Tomatoes in Hanging Baskets: A Complete Guide Growing cherry tomatoes in hanging baskets offers a delightful way to bring fresh produce to even the smallest spaces. Whether you have a sprawling garden or a tiny balcony, the vibrant foliage and sweet, juicy fruits of cherry tomatoes add beauty and flavor to your surroundings. This guide will walk you through every step, from choosing the right basket to harvesting your bountiful crop. Consider these tips your keys to unlocking a cascade of delicious cherry tomatoes right at your fingertips! Why Choose Hanging Baskets fo...
Imagine biting into a sun-ripened tomato, bursting with flavor, even when it's the dead of winter. That's the magic of growing your own tomatoes from seeds indoors! It might seem daunting, but with a little know-how and patience, you can enjoy homegrown tomatoes year-round. Let's dive into the rewarding process of nurturing those tiny seeds into thriving tomato plants, ready to grace your summer salads and sauces.
Why Start Tomatoes Indoors From Seeds?
Starting tomatoes from seeds indoors gives you a significant head start on the growing season, especially in regions with shorter summers. By the time the last frost has passed and the ground is warm enough, your seedlings will be strong and ready to transplant outdoors. This translates to earlier harvests and a longer period to enjoy fresh, homegrown tomatoes. Plus, you have a much wider selection of tomato varieties to choose from compared to what's typically available as seedlings in garden centers. You can explore heirloom varieties with unique flavors and colors, or select disease-resistant hybrids tailored to your local climate. Growing tomatoes indoors also protects the seeds from harsh outdoor elements that would otherwise inhibit seed germination and growth.
Getting Started: What You'll Need
Before you embark on your tomato-growing adventure, gather the necessary supplies. Having everything on hand will streamline the process and set you up for success.
Essential Supplies for Growing Tomato Seeds Indoors:
- Tomato Seeds: Choose varieties suited to your climate and growing conditions. Research disease resistance, fruit size, and days to maturity. Consider starting with a mix of varieties for different flavors and uses.
- Seed Starting Mix: This is crucial! Don't use garden soil. A seed starting mix is lightweight, sterile, and provides excellent drainage. Look for mixes containing peat moss, vermiculite, and perlite.
- Seed Trays or Containers: Seed trays with individual cells are ideal for starting multiple seeds. You can also use small pots, yogurt cups (with drainage holes!), or repurposed containers.
- Humidity Dome or Plastic Wrap: This helps maintain consistent moisture levels, which is essential for germination.
- Grow Lights: Adequate light is vital for healthy seedling development. A simple shop light with fluorescent bulbs or LED grow lights will suffice.
- Heat Mat (Optional): Tomato seeds germinate best in warm soil (70-80°F). A heat mat provides consistent bottom heat, accelerating germination.
- Watering Can or Spray Bottle: Use a gentle watering can or spray bottle to avoid disturbing the seeds or seedlings.
- Labels and a Marker: Label each tray or pot with the tomato variety and the date of planting. This will help you keep track of your seedlings.
Step-by-Step Guide: How to Grow Tomatoes From Seed Indoors
Now that you have all the necessary supplies, let's walk through the process of planting and nurturing your tomato seeds indoors.
1. Sowing the Seeds:
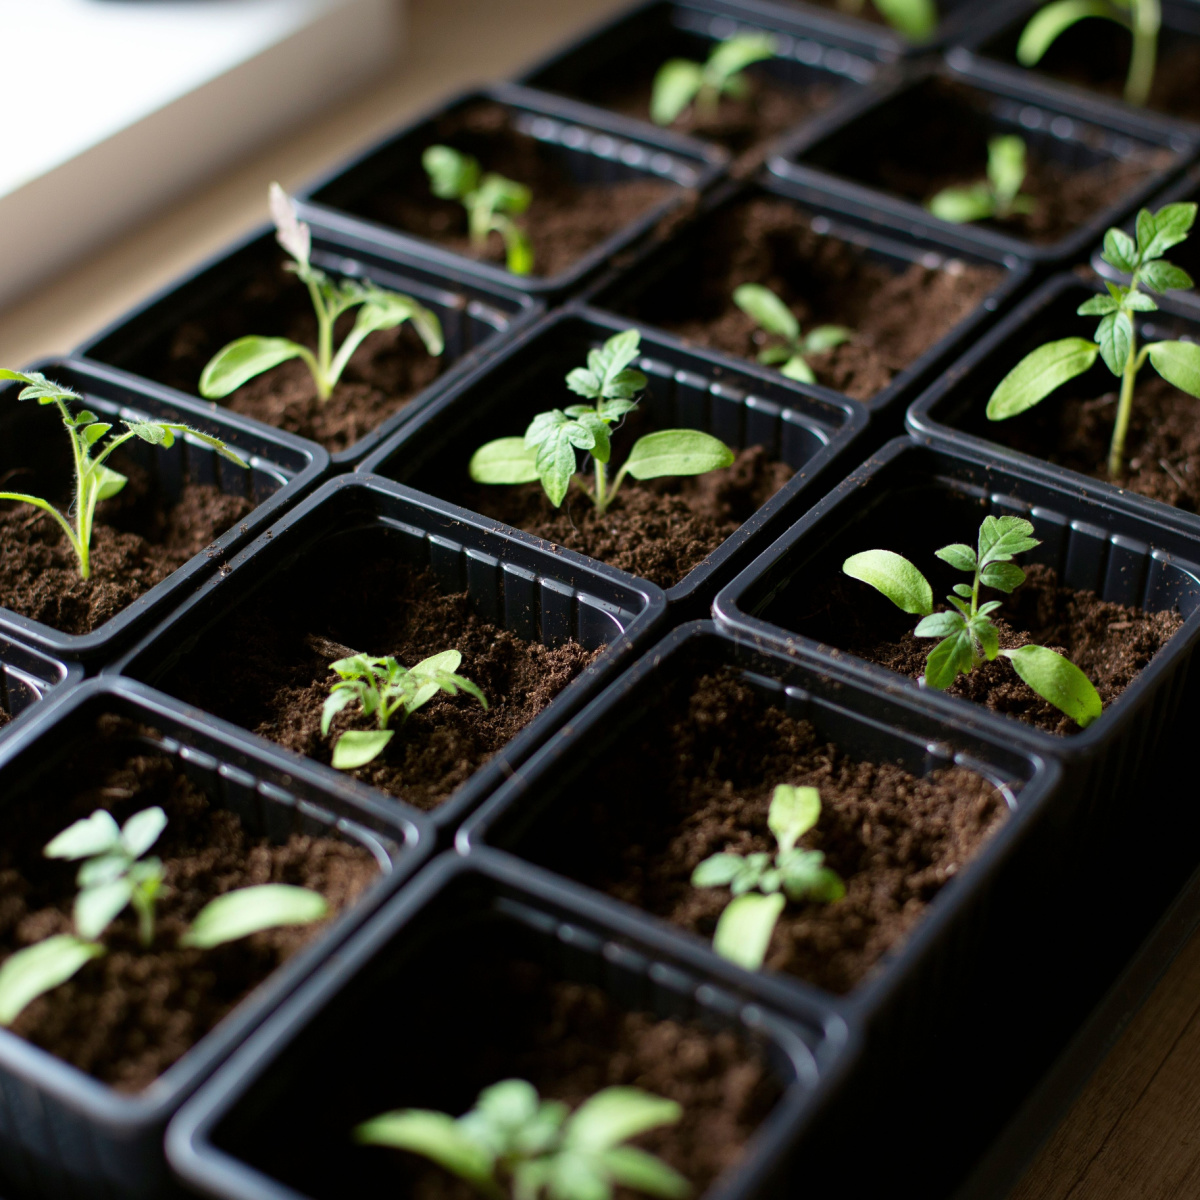
Moisten the seed starting mix thoroughly. Fill your seed trays or containers with the moistened mix, leaving about half an inch of space at the top. Gently press the soil to compact it slightly. Sow 2-3 seeds per cell or container, about ¼ inch deep. Cover the seeds with a thin layer of seed starting mix and gently water again.
2. Creating the Ideal Germination Environment:
Cover the seed trays or containers with a humidity dome or plastic wrap to create a humid environment. Place the trays on a heat mat, if using, and position them under the grow lights. Maintain a consistent temperature of 70-80°F (21-27°C) for optimal germination. Keep the grow lights on for 14-16 hours per day.
3. Monitoring and Watering:
Check the trays daily to ensure the soil remains moist but not soggy. Use a spray bottle to mist the soil if it starts to dry out. Once the seedlings emerge (typically within 5-10 days), remove the humidity dome or plastic wrap. Continue to provide consistent light and warmth. If more than one seed germinates in each cell, choose the strongest seedling and gently snip off the others at soil level with a small pair of scissors. This will ensure the remaining seedling has enough space and nutrients to thrive. If you skip this step, the plants may grow to be leggy and too weak to thrive.
4. Providing Adequate Light:
As your seedlings grow, adjust the height of the grow lights to keep them a few inches above the plants. This will prevent the seedlings from becoming leggy and weak. Rotate the trays regularly to ensure even light exposure.
5. Watering Seedlings:
Allow the top of the soil to dry out between waterings. This encourages the roots to grow deeper in search of water. When you water, do so thoroughly, allowing excess water to drain out of the bottom of the containers. Avoid overwatering, as this can lead to root rot.
6. Fertilizing:
Once the seedlings have developed their first set of true leaves (the leaves that look like miniature tomato leaves, not the initial seed leaves), start fertilizing them with a diluted liquid fertilizer specifically formulated for seedlings. Follow the instructions on the fertilizer label carefully. Fertilize every 1-2 weeks.
7. Hardening Off Seedlings Before Transplanting Outdoors:
Before transplanting your tomato seedlings outdoors, you need to "harden them off." This process gradually acclimates the seedlings to the outdoor environment, reducing the risk of shock. About a week or two before the last expected frost, start taking the seedlings outside for a few hours each day, gradually increasing the amount of time they spend outdoors. Start with a sheltered location, such as a porch or patio, and gradually expose them to more sunlight and wind. Bring the seedlings back indoors at night. This gradual introduction to the outdoor elements strengthens the seedlings and prepares them for successful transplanting. This is crucial for the seedlings as they develop thicker stems that are more able to support growth outdoors.
Troubleshooting Common Problems When Growing Tomatoes From Seed Indoors
Even with the best care, problems can arise. Here's how to address some common issues when learning how to grow tomatoes from seed indoors:
- Leggy Seedlings: This indicates insufficient light. Ensure your grow lights are close enough to the seedlings and that they are receiving adequate light (14-16 hours per day). You can also gently brush the seedlings with your hand a few times a day to encourage stronger stems.
- Damping Off: This fungal disease can cause seedlings to collapse and die. Prevent damping off by using sterile seed starting mix, providing good air circulation, and avoiding overwatering. If you notice damping off, remove the affected seedlings immediately.
- Yellowing Leaves: This can indicate nutrient deficiency. Start fertilizing your seedlings with a diluted liquid fertilizer. Also, ensure you're not overwatering them, as this can also cause yellowing leaves.
- Slow Growth: This can be caused by several factors, including insufficient light, cool temperatures, or nutrient deficiency. Ensure your seedlings are receiving adequate light, warmth, and fertilizer.
Transplanting Your Tomato Seedlings Outdoors
Once the danger of frost has passed and the soil has warmed up, it's time to transplant your tomato seedlings outdoors. Choose a sunny location with well-drained soil. Dig a hole slightly larger than the root ball of the seedling. Gently remove the seedling from its container and loosen the roots slightly. Plant the seedling deep, burying the stem up to the first set of leaves. This encourages the development of a strong root system. Water the seedling thoroughly after planting.
Tips for a Bountiful Tomato Harvest
Here are a few extra tips to help you achieve a bountiful tomato harvest:
- Provide Support: As your tomato plants grow, they will need support to prevent the stems from breaking under the weight of the fruit. Use stakes, cages, or trellises to provide support.
- Water Regularly: Tomato plants need consistent moisture, especially during hot, dry weather. Water deeply and regularly, avoiding overhead watering, which can promote disease.
- Fertilize Regularly: Continue to fertilize your tomato plants throughout the growing season with a fertilizer specifically formulated for tomatoes.
- Prune Your Plants: Pruning tomato plants can improve air circulation, reduce disease, and promote fruit production. Remove suckers (the small shoots that grow between the main stem and the branches) regularly.
- Pest and Disease Control: Monitor your tomato plants regularly for pests and diseases. Take action promptly to prevent problems from spreading.
Growing your own tomatoes from seeds indoors is a rewarding experience. By following these tips, you can enjoy a bountiful harvest of delicious, homegrown tomatoes all season long. So, grab your seeds, get your hands dirty, and get ready to savor the taste of success!