Imagine vibrant bursts of red cascading from a hanging basket, a miniature tomato vineyard right outside your door. Growing cherry tomatoes in a hanging basket isn't just a charming aesthetic choice; it's a surprisingly practical way to enjoy fresh, homegrown goodness, even if you're short on space. It's easier than you might think, and the rewards are delicious! Growing Cherry Tomatoes in Hanging Baskets: A Complete Guide Growing cherry tomatoes in hanging baskets offers a delightful way to bring fresh produce to even the smallest spaces. Whether you have a sprawling garden or a tiny balcony, the vibrant foliage and sweet, juicy fruits of cherry tomatoes add beauty and flavor to your surroundings. This guide will walk you through every step, from choosing the right basket to harvesting your bountiful crop. Consider these tips your keys to unlocking a cascade of delicious cherry tomatoes right at your fingertips! Why Choose Hanging Baskets fo...
Imagine biting into a perfectly ripe, juicy tomato, bursting with flavor from your own garden. Now, imagine saving the seeds from that very tomato and growing evenmoredelicious tomatoes next year! Saving tomato seeds for planting is easier than you might think, and it's a fantastic way to connect with nature, preserve your favorite varieties, and save money. Ready to learn how?
Why Save Tomato Seeds For Planting?
Saving tomato seeds offers a multitude of benefits. Beyond the pure satisfaction of nurturing life from seed to table, it also promotes biodiversity and helps you cultivate tomato plants perfectly adapted to your local environment. You're essentially breeding tomatoes for your specific climate and soil, resulting in stronger, more resilient plants over time. Plus, it can save you money from buying new tomato seeds every growing season.
Here's a quick rundown of the key advantages:
- Cost Savings: No more yearly seed purchases.
- Variety Preservation: Keep your favorite heirloom varieties alive.
- Local Adaptation: Plants become better suited to your climate each generation.
- Sustainability: Reduces reliance on commercial seed producers.
- Connection to Nature: A rewarding and educational experience.
Choosing the Right Tomatoes For Seed Saving
Not all tomatoes are created equal when it comes to seed saving. You'll want to select the right fruits to ensure you get viable and true-to-type seeds. This means understanding the difference between hybrid and heirloom tomatoes, and making the right choices. Learning how to collect tomato seeds starts with learning the best tomato for the seeds.
Heirloom vs. Hybrid Tomatoes
This is a crucial distinction!Heirloom tomatoes are open-pollinated varieties that have been around for at least 50 years (though many are much older). Their seeds will produce plants that are very similar to the parent plant.Hybrid tomatoes, on the other hand, are the result of cross-pollinating two different varieties. While hybrids often offer disease resistance and high yields, their seeds usually won't produce plants that are true to type. This means the tomatoes grown from saved hybrid seeds may be different from the parent tomato in size, shape, color, or flavor.
For seed saving, always choose heirloom tomatoes. They offer the best chance of getting plants that are similar to the parent tomato. If you're unsure whether your tomato is an heirloom or a hybrid, check the seed packet or plant label. Hybrid varieties are usually labeled with an "F1" designation.
Selecting the Best Tomatoes For Seed
Once you've chosen your heirloom tomatoes, select the best fruits for seed saving. Choose tomatoes that are:
- Fully ripe: Overripe is even better! This ensures the seeds are mature.
- Healthy and disease-free: Avoid tomatoes with blemishes or signs of disease.
- True to type: Select tomatoes that exhibit the desired characteristics of the variety.
Ideally, select multiple tomatoes from different healthy plants to promote genetic diversity. It's also best to choose tomatoes from plants that produced well and showed good disease resistance throughout the growing season.
When selecting tomatoes from the garden for seed saving, consider the position on the plant. Tomatoes from the center of the plant tend to have a slightly higher chance of being pollinated by the plant itself.
While you're working in your garden, you might find that you need a reliable way to water your plants. We have a 75 FT Garden Hose available that comes with a 10-Function Nozzle and leak-proof metal connectors for all your watering needs. With its kink-free design and lightweight material, our metal water hose is the perfect tool for keeping your garden healthy and vibrant. You can find this garden hose at this link: https://amzn.to/3Yv E0Bo.
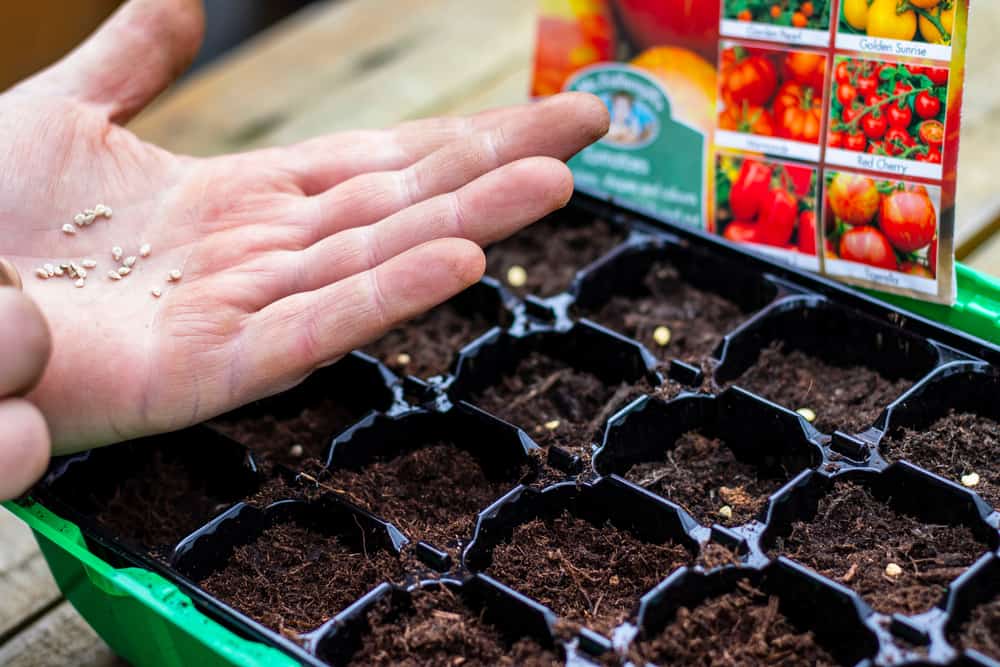
The Fermentation Method: How To Make Tomato Seeds For Planting
The fermentation method is the preferred way to extract tomato seeds. This process removes the gelatinous coating around the seeds, which inhibits germination. Fermentation also helps to kill any seed-borne diseases.
Materials Needed
Before you begin, gather the following materials:
- Ripe tomatoes
- A clean jar or container
- Water
- A spoon
- Paper towels or a screen
- A marker
Step-by-Step Fermentation Process
Here's a detailed guide to the fermentation process:
- Cut the Tomatoes: Cut the tomatoes in half or quarters and squeeze out the seeds and pulp into the jar or container.
- Add Water: Add an equal amount of water to the container.
- Ferment: Cover the container loosely with a lid or paper towel and let it sit at room temperature for 3-4 days. Stir the mixture once or twice a day. You'll notice a layer of mold forming on top – this is normal. A strong, slightly unpleasant odor is also typical.
- Check for Separation: After a few days, the viable seeds will sink to the bottom of the container, while the pulp and non-viable seeds will float to the top.
- Rinse and Separate: Add more water to the container and stir vigorously. Pour off the floating pulp and non-viable seeds. Repeat this process until only clean seeds remain at the bottom.
- Dry the Seeds: Spread the seeds in a single layer on paper towels or a screen. Label the seeds with the tomato variety and date. Allow the seeds to dry completely in a cool, dry place for 1-2 weeks.
- Store the Seeds: Once the seeds are completely dry, store them in an airtight container in a cool, dark, and dry place. A refrigerator or freezer is ideal for long-term storage.
Important Note: Don't be alarmed by the mold and smell during fermentation. It's a natural part of the process and helps to clean and prepare the seeds for planting.
Drying and Storing Your Tomato Seeds For Planting
Proper drying and storage are essential for maintaining the viability of your tomato seeds. Failure to do so can result in seeds that won't germinate or produce weak plants.
Ensuring Thorough Drying
As mentioned previously, spread the clean seeds in a single layer on paper towels or a screen. A coffee filter can also be used. Make sure the seeds are not clumped together. Label them immediately! Place them in a well-ventilated area away from direct sunlight. A dehumidifier can help speed up the drying process, especially in humid climates.
Important Drying Tip: Avoid using heat to dry the seeds, as this can damage them and reduce their germination rate. The ideal drying temperature is between 70-80°F (21-27°C).
Long-Term Storage Solutions
Once the seeds are completely dry, store them in an airtight container. Small glass jars, envelopes, or resealable plastic bags work well. Add a desiccant, such as silica gel packets (available at craft stores), to absorb any residual moisture. Label the container clearly with the tomato variety and the date the seeds were saved. Store the seeds in a cool, dark, and dry place. A refrigerator or freezer is the best option for long-term storage. Seeds stored in a freezer can last for up to 5 years.
Storage Tips:
- Airtight Containers: Prevent moisture and pests from damaging the seeds.
- Desiccants: Absorb any remaining moisture.
- Cool, Dark, and Dry Place: Ideal conditions for long-term storage.
- Labeling: Essential for identifying the seeds later.
Testing Tomato Seed Viability
Even with proper drying and storage, tomato seeds can lose their viability over time. Before planting, it's a good idea to test the germination rate of your saved seeds.
Simple Germination Test
Here's how to perform a simple germination test:
- Gather Supplies: You'll need a paper towel, a plastic bag, and your tomato seeds.
- Moisten the Paper Towel: Moisten the paper towel and squeeze out any excess water.
- Place the Seeds: Place 10-20 tomato seeds on one half of the paper towel.
- Fold and Seal: Fold the other half of the paper towel over the seeds and place the paper towel in a plastic bag. Seal the bag, leaving a small opening for air circulation.
- Incubate: Place the bag in a warm place (around 70-80°F or 21-27°C).
- Check for Germination: After 7-14 days, check the seeds for germination. Count how many seeds have sprouted.
- Calculate Germination Rate: Divide the number of germinated seeds by the total number of seeds and multiply by 100 to get the germination rate. For example, if 15 out of 20 seeds germinated, the germination rate is 75%.
Interpreting the Results
A germination rate of 70% or higher is considered good. If the germination rate is lower than 70%, you may need to sow more seeds to compensate. If the germination rate is very low (below 50%), it may be best to discard the seeds and start with fresh ones.
Example: Let's say you have some tomato seeds that you saved from 3 years ago. You perform a germination test and find that only 6 out of 20 seeds have sprouted. This means the germination rate is only 30%, so you would know that you will need to sow a lot more than you think to get enough to sprout.
Troubleshooting Common Issues
Saving tomato seeds for planting isn't always foolproof. Here are some common issues you might encounter and how to address them:
Mold Growth During Fermentation
As mentioned earlier, mold growth is normal during fermentation. However, if the mold becomes excessive or smells unusually foul, it could be a sign of contamination. In this case, it's best to discard the batch and start again with fresh tomatoes.
Preventive Measures: Ensure your containers are clean, and use fresh, clean water during the fermentation process.
Low Germination Rate
A low germination rate can be caused by several factors, including:
- Immature Seeds: Using tomatoes that were not fully ripe.
- Improper Drying: Drying the seeds too quickly or at too high a temperature.
- Poor Storage: Storing the seeds in a warm, humid place.
- Old Seeds: Tomato seeds naturally lose viability over time.
Solutions: Ensure you use fully ripe tomatoes, dry the seeds properly, store them in a cool, dark, and dry place, and test the germination rate before planting.
Cross-Pollination
While cross-pollination is more of a concern for hybrid tomatoes, it can still occur with heirloom varieties, especially if you're growing multiple tomato varieties close together. To minimize the risk of cross-pollination, you can:
- Grow Varieties Apart: Space different tomato varieties as far apart as possible.
- Hand-Pollinate: Manually pollinate the flowers by transferring pollen from one flower to another.
- Use Isolation Techniques: Cover the flowers with bags or cages to prevent insects from cross-pollinating them.
Saving tomato seeds for planting is a rewarding experience that allows you to connect with nature, preserve your favorite varieties, and save money. With a little knowledge and effort, you can successfully grow delicious tomatoes from your own saved seeds for years to come!