Imagine vibrant bursts of red cascading from a hanging basket, a miniature tomato vineyard right outside your door. Growing cherry tomatoes in a hanging basket isn't just a charming aesthetic choice; it's a surprisingly practical way to enjoy fresh, homegrown goodness, even if you're short on space. It's easier than you might think, and the rewards are delicious! Growing Cherry Tomatoes in Hanging Baskets: A Complete Guide Growing cherry tomatoes in hanging baskets offers a delightful way to bring fresh produce to even the smallest spaces. Whether you have a sprawling garden or a tiny balcony, the vibrant foliage and sweet, juicy fruits of cherry tomatoes add beauty and flavor to your surroundings. This guide will walk you through every step, from choosing the right basket to harvesting your bountiful crop. Consider these tips your keys to unlocking a cascade of delicious cherry tomatoes right at your fingertips! Why Choose Hanging Baskets fo...
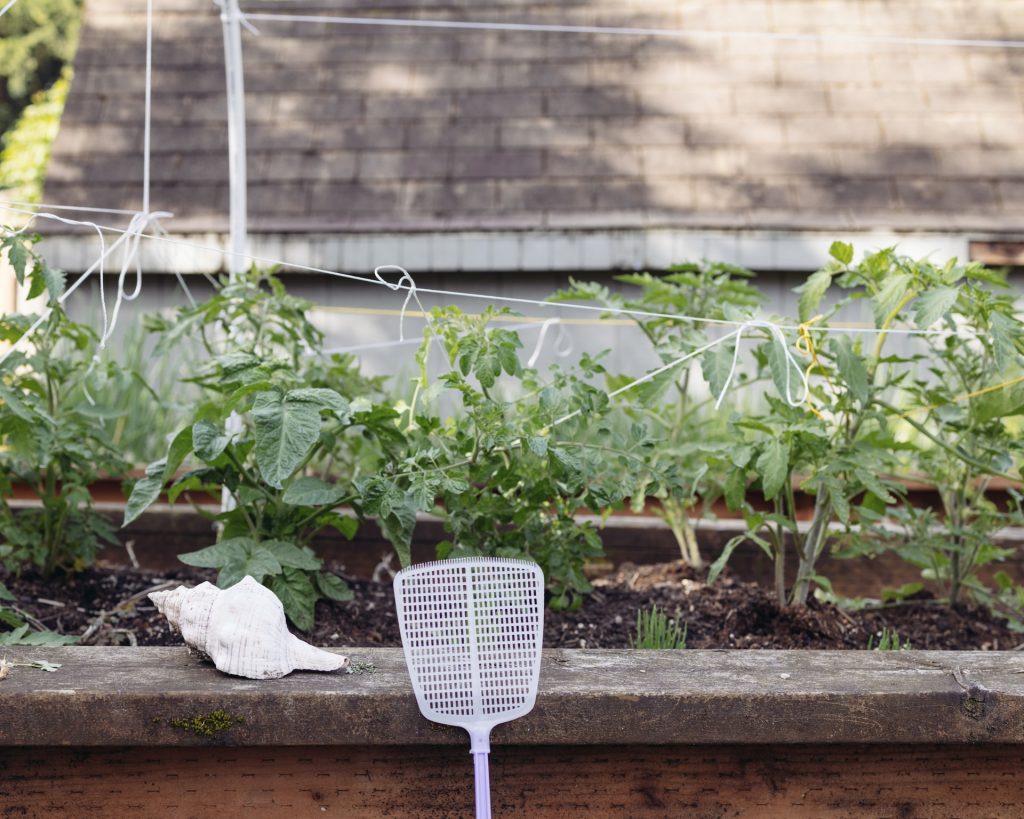
Nothing beats the taste of a homegrown tomato, especially one you've nurtured from a tiny seed. But getting those juicy, flavorful fruits from your raised bed requires more than just sunshine and good soil. One of the most crucial aspects of tomato care is proper watering, and it can be a bit different in a raised bed compared to in-ground planting. Let's dive into the best ways to keep your tomato plants hydrated and thriving in their elevated homes.
Understanding Watering Needs for Tomatoes in Raised Beds
Tomatoes are thirsty plants, no doubt about it. But understanding exactly how much water they need, and when, is key to preventing problems like blossom end rot or cracked fruits. The watering needs of tomatoes in raised beds differ from those grown directly in the ground due to the drainage characteristics of raised beds. It's easy to overwater or underwater in these conditions, so let’s understand the core principles before we dive into techniques.
Why Raised Beds Change Watering Dynamics
Raised beds offer excellent drainage. This can be a major advantage, especially in areas with heavy clay soil, preventing root rot and other waterlogged issues. However, this also means the soil in raised beds tends to dry out faster than the surrounding ground. The elevated structure exposes the soil to more air circulation and sunlight, leading to quicker evaporation. This is why consistent monitoring and a tailored watering approach are essential.
Several factors influence how quickly your raised bed dries out. These include:
- Soil composition: Well-draining soil mixes, crucial for raised beds, can also mean faster water loss.
- Weather conditions: Hot, sunny, and windy weather significantly increases water demand.
- Plant size: Larger tomato plants with extensive foliage require more water.
- Bed Material: Depending on the composition of the bed material, water retention could be different from what is expected.
Recognizing the Signs of Underwatering and Overwatering
Knowing the signs of both underwatering and overwatering is crucial for tomato health. Early detection can save your plants from significant stress. Here’s a quick guide:
Symptoms of Underwatering:
- Wilting: Drooping leaves are the most obvious sign.
- Dry soil: When you stick your finger a couple of inches into the soil, it feels completely dry.
- Stunted growth: The plant's overall growth slows down.
- Yellowing leaves: Particularly older leaves at the bottom of the plant.
- Blossom end rot: While often associated with calcium deficiency, inconsistent watering can exacerbate this issue.
Symptoms of Overwatering:
- Yellowing leaves: Similar to underwatering, but the leaves may appear more swollen and less crisp.
- Wilting: Ironically, overwatering can also cause wilting because the roots are unable to absorb nutrients due to lack of oxygen.
- Soft, mushy spots on fruits: Indicating root rot and fungal diseases.
- Blistered leaves: Swollen leaves can indicate that there is too much water.
- Algae or moss growth: On the soil surface, a sign of consistently moist conditions.
It's important to note that wilting can be a sign of both overwatering and underwatering. The key difference lies in the soil moisture level. Always check the soil before assuming your plant needs more water.
Best Watering Techniques for Tomatoes in Raised Beds
Now that we understand the principles, let's discuss the best techniques for watering your tomatoes in raised beds. Consistency and proper technique are paramount for healthy growth and abundant fruit production.
Deep Watering Less Frequently
The key to successful tomato watering is to water deeply but less frequently. This encourages the roots to grow deeper into the soil, making the plant more resilient to drought and heat stress. Shallow, frequent watering, on the other hand, encourages shallow root growth, making the plant more dependent on constant moisture.
A good rule of thumb is to aim for watering deeply every 2-3 days, depending on the weather and soil conditions. When you water, saturate the soil until water begins to drain from the bottom of the raised bed. This ensures that the entire root zone is moistened. Then, allow the top inch or two of the soil to dry out before watering again.
Deep watering helps prevent diseases, too. When foliage is wet, the possibility of fungal diseases increases. Deep watering reduces that chance.
Watering at the Base of the Plant
Avoid watering the foliage of your tomato plants. Wet leaves create a humid environment that encourages fungal diseases like early blight and septoria leaf spot. Instead, focus on watering at the base of the plant, directing the water towards the soil around the roots.
There are several ways to achieve this:
- Soaker hoses: These hoses slowly release water directly into the soil, providing even moisture distribution.
- Drip irrigation: Similar to soaker hoses, drip irrigation systems deliver water precisely where it's needed.
- Watering can: Use a watering can with a long spout to carefully direct the water at the base of the plant.
No matter the method you choose, make sure the water reaches the root zone without splashing onto the leaves.
Using Mulch to Conserve Moisture
Mulch is your best friend when it comes to conserving moisture in raised beds. A layer of mulch around your tomato plants helps to:
- Reduce evaporation: Mulch acts as a barrier, preventing water from evaporating quickly from the soil surface.
- Suppress weeds: Weeds compete with your tomato plants for water and nutrients.
- Moderate soil temperature: Mulch helps keep the soil cooler in hot weather and warmer in cool weather.
- Prevent soil splashing: Which can spread soil-borne diseases.
Good mulch options for tomatoes include:
- Straw: Readily available and breaks down slowly.
- Shredded bark: Provides good insulation and lasts a long time.
- Compost: Adds nutrients to the soil as it decomposes.
- Grass clippings: Use only if they are free of herbicides.
Apply a layer of mulch about 2-4 inches thick around your tomato plants, keeping it a few inches away from the stem to prevent rot.
The Importance of Good Drainage
While moisture retention is important, good drainage is equally crucial. Make sure your raised bed has adequate drainage holes at the bottom to prevent waterlogging. If the soil is constantly saturated, the roots will rot, and your tomato plants will suffer.
When building your raised bed, choose a location with good drainage. Avoid areas where water tends to pool after rain. Consider adding a layer of gravel or other drainage material at the bottom of the bed before adding soil.
Even with good drainage, heavy rains can sometimes overwhelm the system. If you anticipate prolonged periods of wet weather, consider covering your raised bed with a tarp to prevent excessive saturation.
Monitoring and Adjusting Your Watering Schedule
Watering isn't a one-size-fits-all solution. You'll need to monitor your plants and the soil conditions regularly and adjust your watering schedule accordingly. Here's what to consider:
Checking Soil Moisture Levels
The best way to determine if your tomato plants need water is to check the soil moisture level. Don't rely solely on visual cues like wilting leaves, as these can be misleading. Instead, use your finger or a soil moisture meter to assess the moisture content.
Stick your finger into the soil about 2-3 inches deep. If the soil feels dry to the touch, it's time to water. If it feels moist or even damp, hold off on watering for another day or two. A soil moisture meter can provide a more precise reading, but the finger test is usually sufficient for most gardeners. If you are interested in other products to help you monitor your plant, you could even try an Upgraded Seed Starter Tray with Grow Lights and Heat Mat, 3-in-1 Soil Meter, & Sticky Gnat Traps, 40-Cell Seed Growing Tray, Germination & Plant Propagation Station for Indoor Plants. You can find a fantastic one here: https://amzn.to/3Sjp Saz.
Adjusting for Weather Conditions
Weather plays a significant role in how much water your tomato plants need. In hot, sunny, and windy weather, they will need more water than in cool, cloudy, and humid weather. Increase the frequency and amount of watering during hot spells. Reduce watering during periods of rain or high humidity.
Pay attention to the forecast and adjust your watering schedule accordingly. If you know a heat wave is coming, water your plants deeply the day before to prepare them. If rain is expected, skip watering altogether.
Considering the Plant's Growth Stage
Tomato plants have different watering needs at different stages of growth. Young seedlings require less water than mature plants. During fruit production, the plants need more water to support the developing fruits.
As your tomato plants grow larger, increase the amount of water you give them. Pay close attention to their needs during fruit set and ripening, as this is when they are most vulnerable to water stress.
Troubleshooting Common Watering Problems
Even with the best watering practices, you may still encounter some problems. Here are some common issues and how to address them:
Blossom End Rot
Blossom end rot is a common problem in tomatoes caused by a calcium deficiency in the developing fruit. While calcium deficiency is often the underlying cause, inconsistent watering can exacerbate the problem. Fluctuations in soil moisture can interfere with the plant's ability to absorb calcium.
To prevent blossom end rot, ensure consistent watering and amend the soil with calcium-rich materials like bone meal or crushed eggshells before planting. You can also use a calcium foliar spray as a temporary solution.
Cracked Fruits
Cracked fruits are another common problem associated with inconsistent watering. When tomato fruits experience rapid changes in moisture levels, the skin can crack. This is especially common after a period of drought followed by heavy rain or overwatering.
To prevent cracked fruits, maintain consistent soil moisture levels and avoid overwatering. Choose tomato varieties that are less prone to cracking, such as those with thicker skins.
Fungal Diseases
Overwatering and wet foliage can create a favorable environment for fungal diseases like early blight, septoria leaf spot, and late blight. These diseases can cause leaf spots, yellowing, and eventually lead to plant death.
To prevent fungal diseases, water at the base of the plant, provide good air circulation, and avoid overwatering. Use a fungicide if necessary, following the label instructions carefully.
By understanding the specific watering needs of tomatoes in raised beds, monitoring your plants closely, and adjusting your watering schedule as needed, you can ensure a bountiful harvest of delicious, homegrown tomatoes.