Imagine vibrant bursts of red cascading from a hanging basket, a miniature tomato vineyard right outside your door. Growing cherry tomatoes in a hanging basket isn't just a charming aesthetic choice; it's a surprisingly practical way to enjoy fresh, homegrown goodness, even if you're short on space. It's easier than you might think, and the rewards are delicious! Growing Cherry Tomatoes in Hanging Baskets: A Complete Guide Growing cherry tomatoes in hanging baskets offers a delightful way to bring fresh produce to even the smallest spaces. Whether you have a sprawling garden or a tiny balcony, the vibrant foliage and sweet, juicy fruits of cherry tomatoes add beauty and flavor to your surroundings. This guide will walk you through every step, from choosing the right basket to harvesting your bountiful crop. Consider these tips your keys to unlocking a cascade of delicious cherry tomatoes right at your fingertips! Why Choose Hanging Baskets fo...
Imagine fresh, juicy tomatoes bursting with flavor, grown right on your balcony or windowsill, even if you're short on space. That's the magic of the Tiny Tim tomato plant! But before you rush out to buy one, understanding the right container size is key to a successful harvest. Let's dig in and explore the ideal pot for your miniature tomato marvel.
Tiny Tim Tomato Plant Container Size: Getting Started
The container size for Tiny Tim tomatoes is one of the most important factors in its successful growing. Tiny Tim tomatoes are determinate dwarf plants. This means they grow to a certain size, produce their fruit, and then stop growing. This compact growth habit makes them exceptionally well-suited for container gardening, even in the smallest of spaces. However, even dwarf varieties need adequate space for their roots to thrive. Choosing the correctTiny Tim tomato pot size is essential for optimal growth and fruit production.
What's the Ideal Tiny Tim Tomato Pot Size?
For a single Tiny Tim tomato plant, a container that holdsat least one gallon is generally recommended. Atwo-gallon pot is even better! This provides sufficient room for the root system to develop without becoming root-bound. A root-bound plant will struggle to absorb nutrients and water, leading to stunted growth and reduced fruit yield. While you might be tempted to squeeze it into something smaller, resist the urge – you'll thank yourself later!
Here's a quick reference guide:
Minimum: 1 gallon Recommended: 2 gallons Larger:3-5 gallons (for increased stability and moisture retention, especially in hot climates)
Why Does Tiny Tim Tomato Plant Container Dimension Matter?
Theright size containerallows the roots to spread out and access the nutrients they need. Think of it like this: you wouldn't expect a marathon runner to perform their best if they were confined to a tiny treadmill. Similarly, a Tiny Tim tomato plant needs enough "legroom" for its roots to flourish.
Here's a breakdown of the benefits of a correctly sized container:
Healthy Root Development: Ample space promotes strong root growth, which is crucial for nutrient uptake. Improved Water Retention: Larger containers retain moisture longer, reducing the frequency of watering. Increased Stability: A heavier pot provides better stability, preventing the plant from tipping over in windy conditions. Enhanced Fruit Production: A healthy plant is a productive plant! With enough room to grow, your Tiny Tim will reward you with a bountiful harvest.
Choosing the Right Type of Container for Tiny Tim Tomatoes
Besides the size, the material of your container also matters. Here are a few popular options and their pros and cons:
Plastic Pots: Lightweight, inexpensive, and readily available. They retain moisture well but can overheat in direct sunlight. Consider using light-colored plastic pots to reflect heat. Terracotta Pots: Porous and allow for good airflow, preventing root rot. However, they dry out quickly and can be heavy to move. Fabric Pots (Grow Bags): Excellent drainage and aeration, promoting healthy root development. They are also lightweight and easy to store. Resin Pots: Durable and weather-resistant, offering a good balance between plastic and terracotta.
Regardless of the material you choose, make sure the container has drainage holes! Standing water can lead to root rot, which can quickly kill your Tiny Tim tomato plant.
Tiny Tim Tomato Plant Container Material Recommendation
While personal preference plays a role, I recommend using eitherfabric pots orlight-colored plastic pots for Tiny Tim tomatoes. Fabric pots offer excellent drainage and aeration, while light-colored plastic pots help prevent overheating. Both options are relatively inexpensive and readily available.
Potting Mix and Soil for Tiny Tim Tomatoes Grown in Containers
The potting mix is just as important as the container size. Avoid using garden soil, as it can be too heavy and compact for container gardening. Instead, opt for ahigh-quality potting mix specifically formulated for containers.
A good potting mix should be:
Well-draining: To prevent root rot. Nutrient-rich: To provide essential nutrients for growth. Lightweight:To allow for good aeration.
Consider adding compost or other organic matter to your potting mix to further enhance its fertility. You can also add a slow-release fertilizer to provide a steady supply of nutrients throughout the growing season.
Nutrient Requirements for Tiny Tim Tomatoes
Tiny Tim tomatoes, like all tomatoes, are heavy feeders. They require a steady supply of nutrients, especially nitrogen, phosphorus, and potassium (NPK). Look for a fertilizer specifically formulated for tomatoes, with a balanced NPK ratio or one slightly higher in phosphorus to promote fruit production. Follow the instructions on the fertilizer packaging carefully to avoid over-fertilizing, which can damage your plants.
As you embark on your seed starting journey, remember that having the right equipment can make all the difference. For example, the Upgraded Seed Starter Tray with Grow Lights and Heat Mat offers a great option for helping seedlings thrive. This 3-in-1 soil meter, & sticky gnat traps, 40-Cell Seed Growing Tray helps with plant propagation station for indoor plants. Find this essential gardening tool on Amazon: https://amzn.to/3Sjp Saz.
Tips for Growing Tiny Tim Tomatoes in Containers
Here are a few additional tips to help you grow healthy and productive Tiny Tim tomatoes in containers:
Sunlight: Tiny Tim tomatoes need at least 6-8 hours of sunlight per day. Place your container in a sunny location, such as a south-facing balcony or patio. Watering: Water regularly, especially during hot weather. Check the soil moisture frequently and water when the top inch feels dry to the touch. Avoid overwatering, which can lead to root rot. Fertilizing: Feed your Tiny Tim tomato plant every 2-3 weeks with a tomato-specific fertilizer. Support: While Tiny Tim tomatoes are relatively compact, they may still benefit from some support, especially when loaded with fruit. Use a small stake or tomato cage to provide support. Pruning: Pruning is generally not necessary for Tiny Tim tomatoes, as they are determinate plants. However, you can remove any yellowing or dead leaves to improve airflow and prevent disease. Pest and Disease Control: Keep an eye out for common tomato pests and diseases, such as aphids, whiteflies, and early blight. Take action promptly to prevent infestations or diseases from spreading.
Troubleshooting Common Problems
Even with the best care, you may encounter some challenges when growing Tiny Tim tomatoes in containers. Here are a few common problems and how to address them:
Yellowing Leaves: Can be caused by overwatering, underwatering, nutrient deficiencies, or disease. Adjust your watering schedule, fertilize regularly, and inspect the plant for signs of pests or diseases. Blossom End Rot: A calcium deficiency that causes the bottom of the tomato to turn black and rot. Ensure your potting mix contains adequate calcium and water regularly. Poor Fruit Set: Can be caused by high temperatures, poor pollination, or nutrient deficiencies. Hand-pollinate the flowers by gently shaking the plant or using a small brush. Pests: Treat pest infestations with insecticidal soap or neem oil.
Harvesting Your Tiny Tim Tomatoes
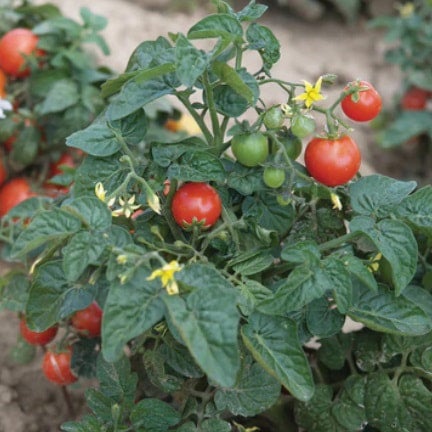
Tiny Tim tomatoes are typically ready to harvest in 50-60 days from transplanting. The tomatoes will turn a bright red color when ripe and will be slightly soft to the touch. Gently twist the tomato from the vine. Enjoy your homegrown Tiny Tim tomatoes fresh off the plant, in salads, or in your favorite recipes!
By following these tips, you can successfully grow Tiny Tim tomatoes in containers and enjoy a delicious harvest, even with limited space. Happy gardening!